🚀 How to create a static HUGO site and host it on AWS
Nov 12, 2024·
Louis QUES
·4 min read
For this first article on my blog, I’ll start from the beginning and explain how I hosted my static site on Amazon AWS’s S3 service.
For this tutorial, I used a demonstration domain name.
We need to create 2 buckets: one for “domain.com” and another for the subdomain “www.domain.com”
1) Create the bucket for “domain.com”
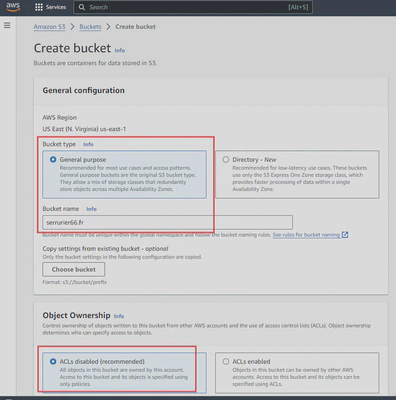
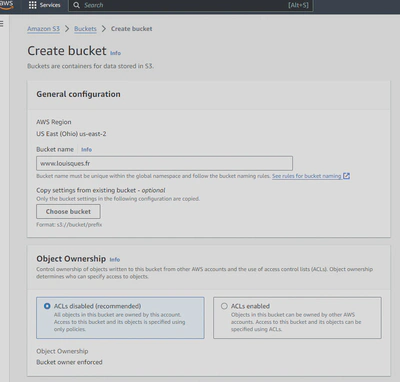
a. Create the bucket on S3
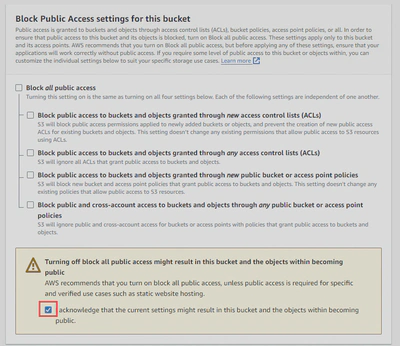
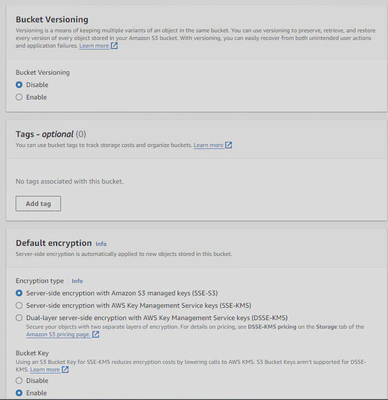
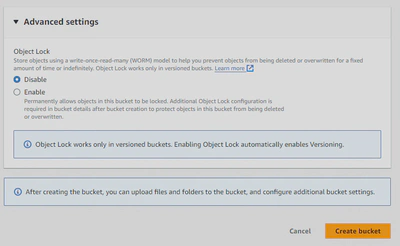
It’s important to complete all steps in the same region. In my case, I chose the N. Virginia region. The Bucket name must match exactly the domain you’re going to use.
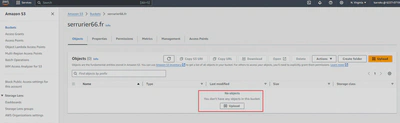
Once this step is completed, go back to Buckets and click on your bucket name to configure the static site hosting. Amazon S3 > Buckets > yourbucket.com then go to properties and scroll down until Static website hosting
Then go to Bucket policy in the Permissions tab (next to the Properties tab) and copy/paste exactly the same code, only changing the Bucket-Name/ in the last line.
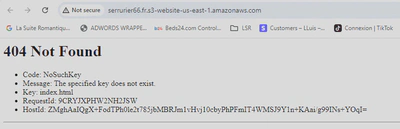
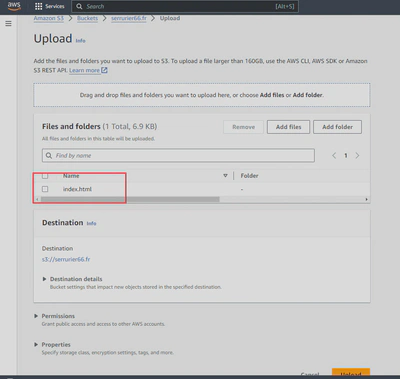
If you navigate to the URL provided by Amazon, (find the URL at Static website hosting under Properties tab ) the site works but shows an error because there’s no page to serve. We simply need to upload an index.html file
Upload a file named index.html and test again.
b. Route53 - Hosted zone
We’ll now link our domain name (identical to the bucket) to our S3 bucket. In my case, the domain name was purchased from OVH. Regardless of where you buy the domain name, the procedure remains exactly the same.
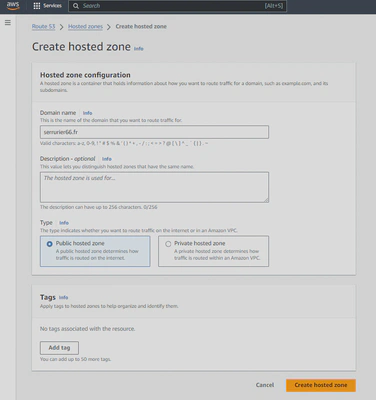
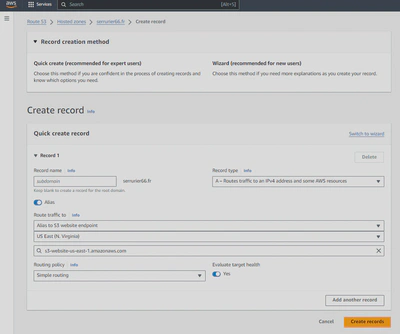
For this, we’ll create a public Hosted Zone on Route53.
Puis nous creons un enregistrement de type A. avec Route traffic to : Alias to S3website endpoint. Gardez la même région.
Dans Records notez les 4 Names Servers (NS).
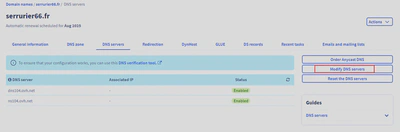
Go to your registrar’s website (OVH in my case) and change the current NS of your domain name with the 4 provided just above 👆.
In OVH’s case, they only provide 2 NS by default. Delete them and add Amazon’s 4 NS. Save the changes. The NS won’t appear immediately, it takes some time to propagate.
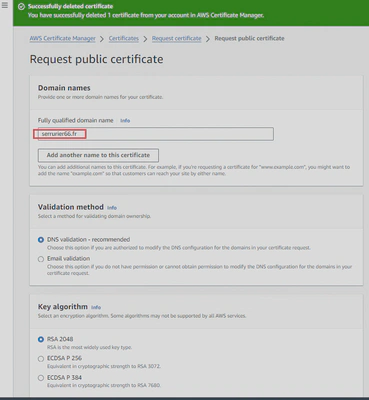
c. Certificate Manager - SSL
We’ll now create SSL certificates so our site can be accessed via HTTPS.
Go to AWS Certificate Manager > Certificates > Request certificate > Request public certificate
d. Cloudfront
Final step, we’ll configure Cloudfront to improve the security and distribution speed of our site.
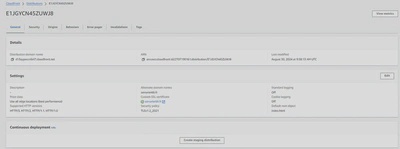
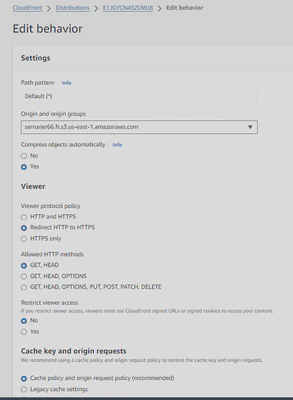
Go to Cloudfront > Distributions and select your site’s distribution name. Click on Edit in the Settings section
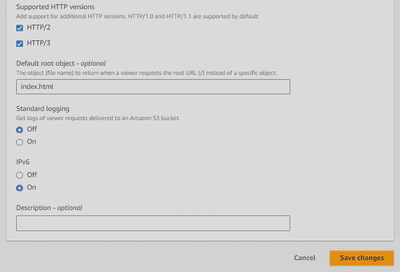
Fill in like this:
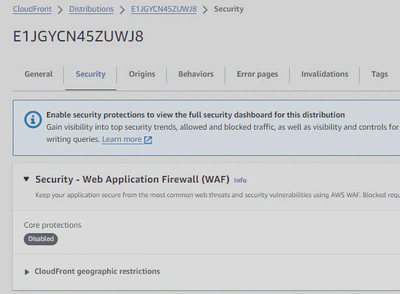
Go to Security tab.
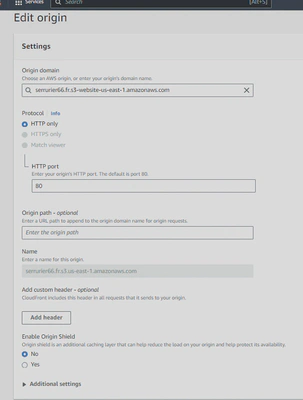
Edit Origin
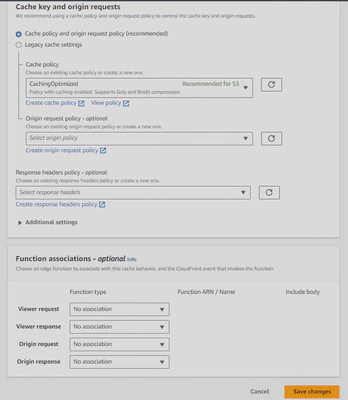
Edit behavior
We have completed all steps for creating the site with the domain name example.com. If you want the site to also display when browsing to www.example.com, you need to create another bucket with redirection to example.com. I detail this procedure in the next step.👇
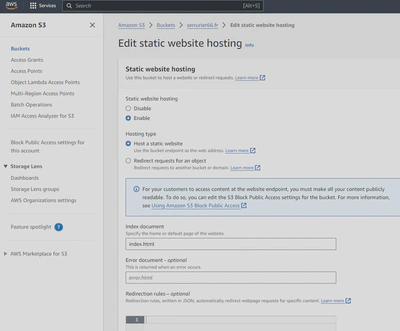
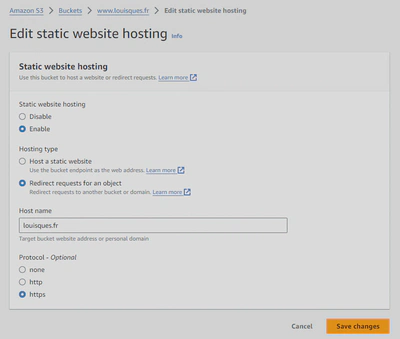
Scroll down to the Static website hosting section and click Edit
Choose Redirect requests for an object
In the Host name field, enter your root domain (for example, yourdomain.com)
In the Protocol field, choose https
Click Save changes
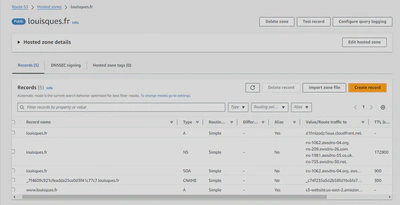
c. Route 53 Alias Record:
We’ll create DNS zone records (Hosted Zone) like this:
Record name: www
Record type: A (or AAAA)
Alias: Yes
Route traffic to: Alias to S3 website endpoint
Region: Select your S3 bucket's region
S3 bucket endpoint: www.yourdomain.com
Save the record.
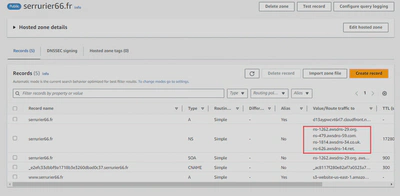
Example hosted zone. Here’s what you should have at the end.
If you’ve followed these steps exactly, you should have a working hosting setup with both the root domain and www. Your hosting can now accommodate a static site/blog such as HUGO.